Category: Blog

Blog posts

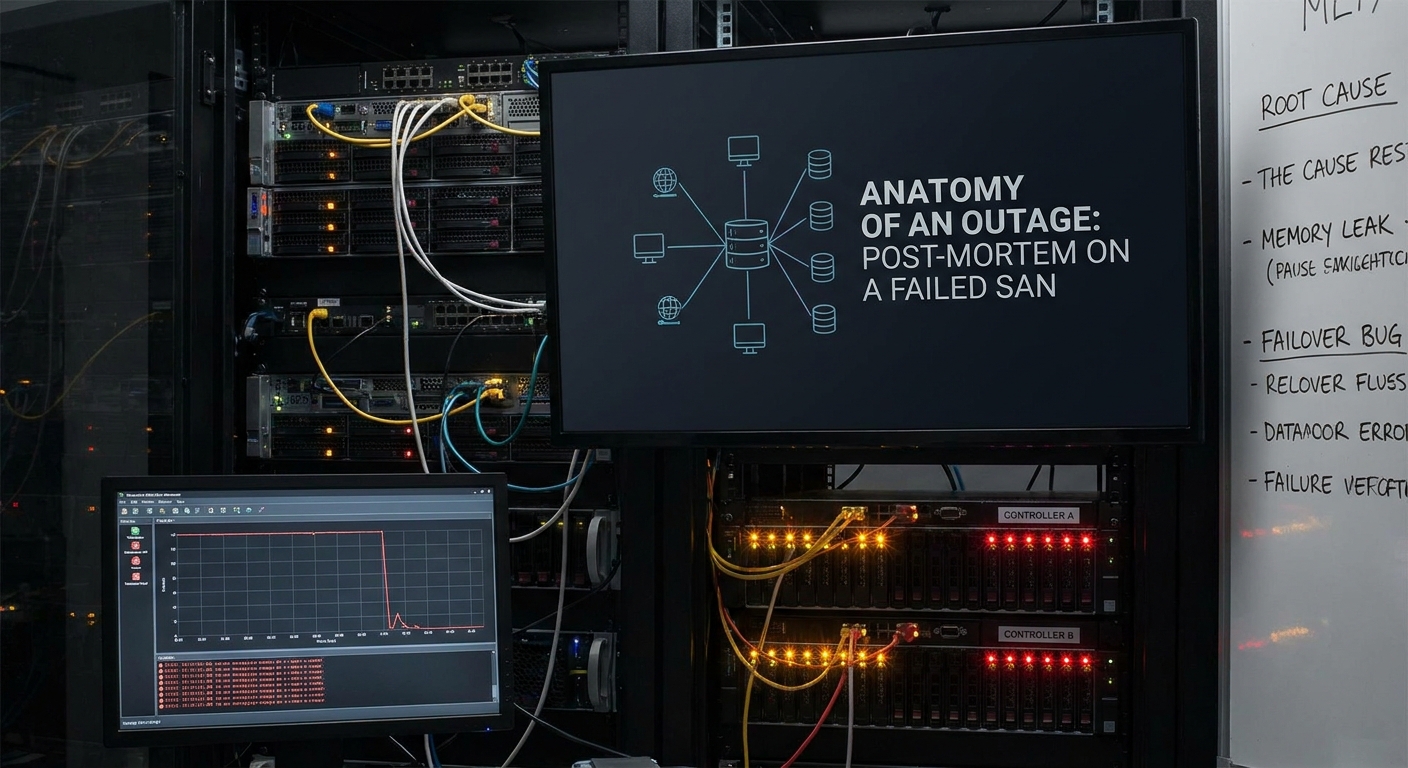
  • Episode 29: Anatomy of an Outage: Post-Mortem on a Failed SAN

    Hello and welcome back to Architecting Zero Downtime Infrastructure!

    Today, we’re doing something a little different, but something I find absolutely invaluable in my own practice. We’re going to conduct a full post-mortem. We’re going to dissect a real-world, anonymized case of a supposedly ‘bulletproof’ Storage Area Network (SAN) that went down, and went down hard.

    We’ll explore the initial trigger… walk through the terrifying cascade of failures as they rippled through the system… and then distill the critical lessons learned from the wreckage. In my experience, you learn more from one good failure analysis than from a hundred success stories. Understanding precisely why things break is the essential first step to building systems that don’t.

    So, grab a coffee, get comfortable, and let’s dive into the anatomy of an outage.

    The Fortress on Paper: A “Bulletproof” Design

    Let me paint a vivid picture for you. When I look at a system design, I’m searching for layers of resilience. And this one had them all… at least on the surface.

    We’re talking about a mid-range enterprise SAN, the kind you see in thousands of businesses. It was configured exactly how the vendor recommends:

    • Dual, active-active controllers, so if one failed, the other was already running and ready to take the full load.
    • Fully redundant fibre channel fabrics with two entirely separate switches, meaning you could lose a whole switch and service would continue.
    • All servers were connected via multi-path I/O, giving them multiple physical routes to their data.
    • And the data itself was sitting on RAID 6 volumes, which can survive two simultaneous drive failures without data loss.

    On paper, this was a fortress. It was designed to withstand almost any single component failure. And that’s a crucial part of this story—this perceived invincibility. It can breed a very dangerous sense of complacency, a quiet assumption that some parts of your infrastructure are just too resilient to fail.

    The First Whisper of Trouble

    Major outages rarely start with a loud bang. More often, it’s a whisper. And this case was no different.

    The first signs were just intermittent performance degradation alerts bubbling up from the virtual machine monitoring platform. Key database applications became sluggish… just enough to get noticed, but not enough to scream ’emergency’.

    Now, what I typically see in these situations, and what happened here, is that the operations team did exactly what you’d expect. Their instinct was to check the usual suspects:

    1. Is there a runaway query hammering a database?
    2. Do we have a ‘noisy neighbor’—a virtual machine consuming more than its fair share of resources?
    3. Is there a network latency issue somewhere?

    This is the standard playbook, and it’s usually correct! But the SAN… with all its green lights blinking reassuringly, its dual controllers humming away… that was low on the list of culprits. It was the bedrock. It was assumed to be stable. And that assumption is where the real trouble begins. While the team was focused on the application layer, digging through query plans and logs, the ground was shifting beneath their feet.

    The Cascade Begins: From Blip to Blackout

    A critical alert fires from the storage array: ‘Controller A Offline’.

    Now, in a well-architected system, this is the kind of event you plan for. It’s why you paid for the dual-controller model in the first place! What I expect to see here is Controller B seamlessly take over the full workload. There might be a momentary blip in I/O latency, a few seconds perhaps, but end-users should never even notice.

    That, however, is not what happened.

    Instead of a smooth failover, I/O across the entire SAN simply… stopped. It stalled. Within moments, the connected hosts began losing their paths to storage, and that initial application slowdown we talked about transformed into a full-blown, service-impacting outage. The system designed to handle this exact failure had just failed completely.

    And this is where a single fault begins its terrifying cascade. The failover attempt—the very mechanism designed to provide resilience—actually created the catastrophic failure.

    Here’s what went wrong under the hood. Controller A, as it failed, didn’t correctly release a critical lock on a shared piece of metadata. So when Controller B tried to take full ownership, it ran straight into this inconsistent state. Now, any well-designed storage system has a prime directive: protect data integrity at all costs. Faced with this inconsistency, its kernel did what it was programmed to do to prevent corruption: it panicked and forced a reboot.

    The tragedy here is that upon restarting, it immediately tried to take ownership again… hit the very same lock… panicked again… and rebooted. This is the nightmare scenario we plan against. The SAN was now in a catastrophic boot loop, and every single connected service was hard down.

    Entering the Fog of War

    This is the moment that triggers the ‘all-hands-on-deck’ emergency call, bringing together the infrastructure team and the storage vendor’s senior support. The pressure at this point is immense, as the business impact is compounding by the minute.

    What makes these situations so difficult is that initial diagnostics are often confusing. The hardware all reports as healthy, but the controllers refuse to stay online. You’re fighting a ghost in the machine.

    In a crisis, there’s a strong impulse to take a shortcut. The team considered forcing one controller to stay active in a degraded state. And here’s where discipline is so critical. My unbreakable rule in a crisis is this: never trade data integrity for speed. They correctly decided that the potential for data corruption was too high a price to pay. This was the moment of truth, where the premium you paid for that enterprise support contract, and the hours you spent on documentation, are tested in a real-world fire.

    After long hours on the support call, the breakthrough finally came. An escalation engineer, someone with years of pattern recognition, joined the call and said, ‘I think I’ve seen this signature before.’

    The Breakthrough: A Perfect Storm

    It turns out, this wasn’t one failure, but two, acting in concert.

    It all began with a perfect storm. A recent, supposedly minor firmware patch had introduced a subtle memory leak. That leak was then dramatically accelerated by a very specific I/O pattern from a newly deployed application. What I always emphasize is that our environments are never static; a new workload can stress a system in a way it’s never been stressed before.

    When the controller’s memory was finally exhausted, it failed. But that should have been recoverable. The catastrophic event was a second, entirely separate and undiscovered bug, lurking in the failover logic itself. The first failure was simply the key that unlocked the second, far more destructive one.

    The Long Road to Recovery

    Once you have a root cause, you can start on the long road back to normal. The fix here was not a simple reboot. It required booting the entire SAN into a special maintenance mode—something you hope to never do—and applying an emergency patch directly from the vendor’s engineers.

    Then came the part that really tests your nerve: a full, multi-hour consistency check on the underlying metadata. You cannot rush this. Only after that was complete could the team begin what I call the ‘stack climb’. It’s a painstaking process where you reboot the fibre channel switches, then rescan storage on every host, and only then do you bring the applications and databases back online, one by one. At every stage, you are relentlessly verifying data integrity. This is not about speed; it’s about a safe, methodical return to service.

    The Wreckage Report: What We Learned

    So, when the dust settled, what did we actually learn from this painful experience?

    1. Redundancy is Not Infallibility. We build these complex, active-active systems, but the failover logic itself can become a single point of failure. The very software meant to save you can be the thing that takes you down. It’s an uncomfortable truth, but a vital one to accept.
    2. Beware the Tightly-Coupled Architecture. In this case, the two controllers were so interdependent that a software fault on one could effectively poison the other, creating an inescapable loop. When you design, ask yourself: ‘How can these redundant components truly fail independently?’
    3. The Absolute Necessity of ‘Game Day’ Testing. This is the lesson I want you to take back to your own teams. It’s not enough to trust a vendor’s datasheet or a diagram. My personal rule of thumb is that a feature you haven’t tested is a feature you don’t have. You have to be willing to schedule a maintenance window to actually validate the theory. Pull the cable. Power off a controller. Watch what happens. It is the only way to know for certain if your safety net will actually hold your weight when you fall.

    Final Thoughts

    What I hope you take away from this story is that our most resilient systems often hide our most complex failures. The layers of redundancy can create a false sense of security that masks a deeper fragility.

    That’s why, in my own practice, I place so much emphasis on the post-mortem process. A truly blameless process, one focused on learning, is what transforms a catastrophic failure into an invaluable lesson that strengthens the entire team and your infrastructure. It’s how we get better, together.

    And to continue that theme, next time on the podcast, we’ll hear directly from someone who has been in the hot seat. Our next episode is ‘Guest Interview: An IT Manager on Surviving a Catastrophic Storage Failure’. We’ll get into the details of managing not just the technical, but the business and the human side of a major crisis. It’s a powerful story you won’t want to miss.

    Thanks for tuning in to Architecting Zero Downtime Infrastructure! As always, I’d love to hear your thoughts or your own war stories in the comments below.

  • Episode 28: What ‘Five Nines’ Really Costs You

    Hello and welcome back to Architecting Zero Downtime Infrastructure! It’s great to have you with us again.

    Today, we’re going to tackle a term you’ve almost certainly heard thrown around in meetings, sales pitches, and technical documentation: ‘Five Nines’. In my experience, it’s often treated as this magical marketing buzzword, a shiny badge of honor that promises near-perfect reliability. But I want to pull back the curtain and explore how it’s actually a foundational concept in reliability engineering.

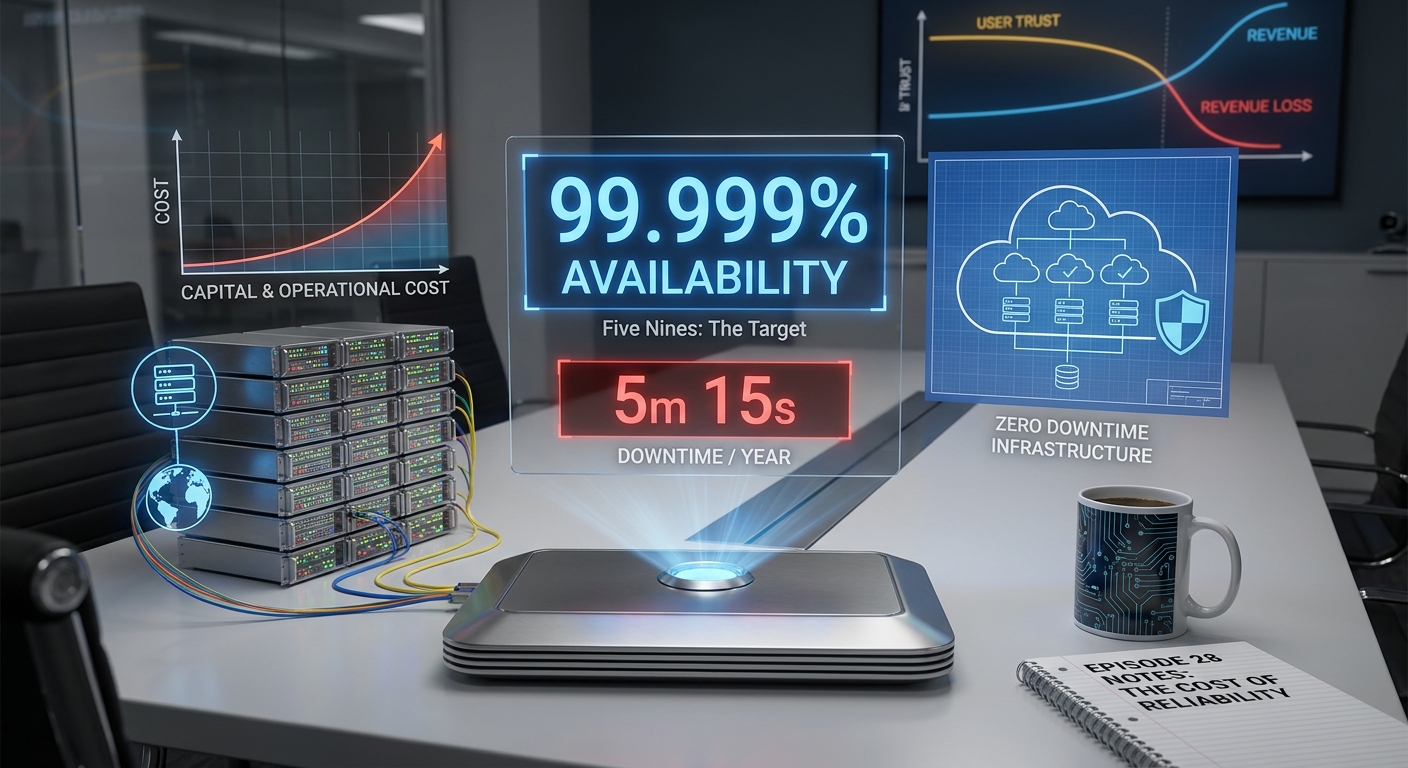
    Why does this matter? Because getting this wrong—misunderstanding what it means and what it costs—has very real, and often very expensive, consequences for your business, your budget, and your reputation. It all comes down to a single number: 99.999%. It sounds incredibly close to perfection, doesn’t it? But it still allows for failure.

    So, before we go any further, take a moment and guess. Over the course of an entire year, how much actual downtime does that 99.999% percentage permit? An hour? Thirty minutes? Five minutes? The answer is the key to understanding everything that follows. Let’s dive in.

    The Brutal Math of Availability

    Let’s put some hard numbers to these percentages, because this is where the abstract idea of ‘nines’ becomes painfully concrete. When I’m evaluating a system, I often start with a baseline that sounds pretty reasonable on paper.

    • 99% Uptime (‘Two Nines’): This allows for 3.65 days of downtime per year. That’s over 87 hours! For most online businesses, being offline for more than three and a half days is simply catastrophic. Not acceptable.
    • 99.9% Uptime (‘Three Nines’): Here, we’re down to 8.77 hours of downtime a year. That’s a huge improvement, but it’s still more than a full business day. Can your operations—or your customer trust—survive being offline for an entire day?
    • 99.99% Uptime (‘Four Nines’): Now we’re making a serious leap. This brings us down to just 52.6 minutes of downtime for the entire year. Suddenly, we’re in the realm of high-availability.
    • 99.999% Uptime (‘Five Nines’): And here it is, the coveted goal. This brings you down to a mere 5.26 minutes of downtime per year. Just over five minutes where things can be broken.

    What you absolutely must understand is that the journey from one ‘nine’ to the next is not a gentle stroll. It’s an exponential climb up a very steep, very expensive mountain. The engineering effort, architectural complexity, and operational cost required to get from three nines to four is dramatically higher than going from two to three. And getting to that fifth nine? That’s a whole different level of commitment.

    The Biggest Problem Isn’t the Math… It’s the Definition

    On the surface, the formula for calculating uptime seems simple: (Total Time Available) / (Total Time Measured). But I’ve found that the biggest flaw in that formula isn’t the math; it’s the definition of a single, crucial word: downtime.

    What does ‘down’ actually mean to your business? Let me paint a vivid picture.

    Imagine a critical API call that normally responds in 50 milliseconds suddenly starts taking five full seconds. Is the service down? Technically, it’s still responding—it hasn’t thrown an error. But for the user waiting for the page to load, it might as well be. Or what if your website is up and running, serving pages beautifully, but the third-party payment gateway is failing every transaction? Your servers are humming along, but from the user’s perspective, your service is completely broken. They can’t accomplish what they came to do.

    This is why I find that simply talking about ‘uptime’ isn’t precise enough for serious reliability work. You need to get more specific. This is where we introduce two powerful concepts:

    1. Service Level Indicators (SLIs): These are the specific, quantitative metrics you track. Think latency, error rate, throughput, or system saturation.
    2. Service Level Objectives (SLOs): These are the precise targets you set for your SLIs. For example, ‘99.9% of homepage requests will be served in under 200ms.’

    Moving to an SLI/SLO model takes us from a vague, fuzzy idea of ‘uptime’ to a concrete, measurable, and actionable definition of performance. It shifts the entire conversation.

    Down is Down: The User’s Perspective Matters Most

    This brings us to another debate I see all the time: planned vs. unplanned downtime. Unplanned downtime is an outage—something has failed. Planned downtime is a scheduled maintenance window for an upgrade or a patch.

    Now, here’s a little detail that often causes arguments: many Service Level Agreements (SLAs) will explicitly exclude planned downtime from their availability calculations. This is a neat trick that keeps the numbers looking great on a report. But here’s my unbreakable rule: from your user’s perspective, down is down.

    Your users don’t care why your service is unavailable. They don’t differentiate between a database failure and a planned deployment. All they know is that they tried to use your service, and it failed them. This is why I think it’s far more valuable to measure what we call user-perceived availability. The real question isn’t, ‘Are our servers responding to pings?’ The question is, ‘Can the user accomplish their goal?’ If the answer is no, for any reason, you are effectively down in their eyes.

    Let’s Talk Money: The Alarming Cost of an Outage

    Once we’ve defined what ‘down’ means, the next step in my process is always to attach a dollar value to it. This is where the conversation moves from a purely technical exercise to a critical business discussion. Let’s make this real.

    Imagine a successful e-commerce site that generates $1 million an hour in revenue. If you have an outage that lasts just fifteen minutes, you’ve just lost $250,000 in direct revenue. Vanished. That stark calculation focuses the mind immediately.

    But that’s only the most obvious cost. The direct costs are often just the tip of the iceberg.

    • Contractual Penalties: If you have enterprise customers, your SLAs likely have clauses that trigger penalty payouts if you breach your availability promise. Those can add up frighteningly quickly.
    • Operational Cost: When an incident occurs, you pull your most senior, most expensive engineers into a ‘war room’ to fix it. Every minute they spend firefighting is a minute they aren’t spending building new features. This is a direct, and very high, operational cost that often gets overlooked.
    • Reputational Damage: The real, lasting damage, however, is much harder to measure. Every minute of downtime erodes the single most valuable asset you have: customer trust. In today’s hyper-connected world, that broken promise spills onto social media and can become a negative headline in minutes. The harm to your brand can far outlast the outage itself.
    • Opportunity Cost: This, in my view, is the most insidious cost of all. Every time your best engineers are pulled into firefighting, they are not innovating. They are not building the future of your business. They are simply trying to hold the present together. This is a long-term strategic loss that many companies fail to account for.

    So, Is Five Nines Always the Goal?

    If downtime is this expensive, you might be asking, ‘Why not just build everything for five nines and be done with it?’ The simple reason is that this level of availability is anything but free. The cost curve is exponential.

    Architecturally, moving from three nines to four might require shifting from a simple redundant server setup (N+1) in one data center to a fully active-active, multi-region deployment. That’s a monumental leap in complexity, requiring sophisticated global load balancing, data replication strategies, and distributed systems expertise.

    Operationally, the demands become immense. You need advanced, predictive monitoring and automated failover systems that can react faster than a human ever could. It means having a rigorous, well-drilled on-call process and a culture dedicated to reliability.

    This leads to a fundamental question, and the answer is a clear and resounding no. The ‘right’ number of nines is not a technical absolute; it’s a business decision based on a cost-benefit analysis.

    Your customer-facing payment gateway that processes transactions 24/7? Every second of downtime is lost revenue and lost trust. Investing in four or even five nines for that system makes perfect commercial sense. But what about an internal analytics service that runs a batch job overnight to generate a daily report? If that service is down for an hour, the report is delayed. It’s an inconvenience, sure, but it doesn’t stop the business. For that service, a target of three nines might be perfectly sufficient and vastly more cost-effective.

    The goal isn’t to hit five nines everywhere. The goal is to align your investment in availability with the value of the service.

    Beyond Uptime: A Richer View of Health

    Finally, it’s critical to broaden our perspective beyond a simple up-or-down metric. I’ve seen services with 100% uptime that were still completely unusable. If your application takes thirty seconds to respond to every click, is it really ‘up’? From the user’s perspective, it’s broken.

    This is why I encourage teams to monitor a richer set of metrics. A fantastic framework for this comes from Google’s Site Reliability Engineering (SRE) practice, known as the ‘Four Golden Signals’:

    1. Latency: How slow is the service for your users?
    2. Traffic: How much demand is being placed on your service?
    3. Errors: How often are requests failing?
    4. Saturation: How ‘full’ is your service? (i.e., how close are you to a capacity limit?)

    By watching these four signals together, you get a much more complete, high-definition picture of service health. Because a service that is slow, or returning errors, is effectively down—no matter what your uptime dashboard says.

    Tying It All Together

    So, what I hope you take away from our discussion today are three main ideas. First, ‘the nines’ are simply a language we use to measure our tolerance for failure. Second, defining what ‘down’ actually means for your specific service is the most critical part of the entire exercise. And finally, choosing the right availability target is a strategic business decision, a balance between the cost of reliability and the cost of an outage.

    Thank you for joining me on this deep dive. Now that we understand the theory and impact, what happens when it all goes wrong?

    Join us next time for Episode 29, ‘Anatomy of an Outage: Post-Mortem on a Failed SAN’, where we’ll perform a deep-dive into a real-world failure to see what we can learn.

    Until then, what are your thoughts on ‘the nines’? Have you fought these battles in your own organization? Drop a comment below—I’d love to hear from you!

  • Episode 27: The Failure Point Hiding In Your Rack

    Hello and welcome back!

    Welcome to Episode 27 of Architecting Zero Downtime Infrastructure! Today, we’re going on a bit of a treasure hunt. We’re looking for something that’s incredibly dangerous, surprisingly common, and often hiding in plain sight: The Single Point of Failure Hiding in Your Server Rack.

    Now, what I often see in the field is a massive, and frankly correct, investment in redundancy at the application and server level. Teams build these incredibly resilient systems—clustered databases, load-balanced front-ends, you name it. And that is exactly the right approach. But I often find there’s a blind spot.

    We focus so intently on the virtual machines and the code that we forget the humble hardware holding it all together. So, let me pose a question for you… when was the last time you walked over to one of your racks and really considered the resilience of the Power Distribution Unit? Or the top-of-rack network switch?

    My experience tells me that often, the most significant threat to your service is the very component you haven’t thought about in years.

    What Exactly Is a Single Point of Failure?

    Let’s start by being very clear about what we’re looking for. A Single Point of Failure, or SPOF, is any part of a system that, if it fails, will stop the entire system from working. It’s that simple, and that dangerous.

    The way I often explain it to clients is to think about the plumbing in a house. You can have the best faucets and the strongest copper pipes, but if that single main water valve coming into the building fails or is shut off, the entire house goes dry. That valve is a classic single point of failure.

    When we translate that into the data center, our minds tend to jump to a server crashing or a hard disk failing. But the overlooked risks are far more fundamental. We’re talking about a single power cable, a single network switch, or even a specific circuit breaker. The foundational work is simply to identify them. You can’t mitigate a risk you haven’t seen.

    The Most Common Culprit: Power

    Let’s start with the most obvious physical culprit. A server with a single Power Supply Unit (PSU) is the classic example. It’s the lowest bar for resilience, and frankly, in any production environment, I expect to see dual power supplies in every single server.

    But it’s painfully easy to get a false sense of security. You can have a whole rack of dual-PSU servers and still have a massive SPOF. Let me paint a vivid picture for you.

    I remember working with a financial services company. They had spent millions on a fully redundant, high-availability cluster. Every server had dual power supplies, dual network cards, dual everything. But one Tuesday morning, the entire platform went dark. All at once. After a frantic investigation, the cause was found: a facilities engineer, working on a completely unrelated task two aisles away, tripped a single circuit breaker. The breaker that just happened to power their entire ‘redundant’ rack.

    Your resilience is only as strong as your most fundamental connection to the power grid.

    This brings me to what I often call the hidden villain in the rack: the Power Distribution Unit, or PDU. A basic PDU is a classic SPOF. If its own internal breaker trips or the electronics inside fail, every single device plugged into it loses power. Instantly.

    The most common configuration error I see involves those dual-power-supply servers. Teams will correctly specify redundant PSUs but then plug both power cords into the same PDU for convenience. And that, right there, undermines the entire investment. When that one PDU goes offline, both paths to power are severed, and the server goes down.

    The Solution: True A/B Power Resilience

    So, how do we solve this properly? The industry standard, and the only configuration I consider acceptable for production systems, is a design built around A/B power feeds.

    Think of these as two completely independent power circuits delivered to your rack. They should come from different distribution boards and be protected by different breakers. They are entirely separate paths from the utility room to your hardware.

    The implementation is straightforward, but it requires discipline:

    1. Install two separate PDUs in the rack. One is the ‘A’ PDU, and the other is the ‘B’ PDU.
    2. Connect the ‘A’ PDU exclusively to the A-side power feed.
    3. Connect the ‘B’ PDU exclusively to the B-side power feed.

    Now for my unbreakable rule: For every dual-power-supply server, you plug one power cord into the ‘A’ PDU and the second cord into the ‘B’ PDU. That’s it.

    Now you have true fault tolerance. You can lose an entire feed, an upstream breaker can trip, or one of the PDUs can fail… and your server will continue humming along, uninterrupted, on the remaining supply. That is the foundation of a resilient rack.

    The Other Hidden Villain: The Network

    Now that we’ve established a solid power foundation, let’s turn our attention to networking, because there’s another hidden villain that operates on exactly the same principle: the Top-of-Rack (ToR) switch.

    In many configurations, every single server in that rack plugs into one switch for its network access. You can probably see where this is going. That switch becomes a massive single point of failure. It doesn’t matter how resilient your servers are; if that one piece of hardware fails—from a hardware fault, a power issue, or even a firmware update that goes wrong—the entire rack is effectively cut off from the world.

    You’ve created an island. Your applications might be running perfectly, but if they can’t speak to the network, they’re useless.

    The solution mirrors our approach to power. It’s about creating parallel, independent paths. My personal rule of thumb for a production rack is to have two Top-of-Rack switches, a Switch A and a Switch B.

    Each server should then have at least two network interface cards (NICs). The cabling discipline is simple but critical: one NIC plugs into Switch A, and the other plugs into Switch B. The final piece is configuring the server’s operating system to bond or team these two physical connections into a single, logical one. The OS is smart enough to see both paths and will automatically failover if one link disappears. The result? You can take an entire switch offline for maintenance, and not a single server in that rack loses its connection.

    Don’t Forget the Human Element

    We’ve addressed the hardware, but I’ve seen perfectly designed racks fail because of something else. The single point of failure isn’t always a device… sometimes, it’s a person or a process.

    I’m talking about the ‘hero engineer’—the one person who knows how everything is configured and holds all the critical passwords in their head. That individual is a huge organizational risk. What happens if they’re on a plane or leave the company?

    This risk extends to process. When I walk a data center floor, I’m looking for discipline. Unlabeled cables—what we call ‘cable spaghetti’—are a process failure waiting to happen. It makes it far too easy for a well-meaning engineer to unplug the wrong server during a high-pressure incident. If your rack’s diagrams are out of date, you’re flying blind in an emergency.

    Technology alone doesn’t create resilience. It’s the disciplined processes and shared knowledge that truly keep your systems online.

    Your Turn: A Quick Rack Audit

    Let’s make this practical. I encourage you to perform a simple audit on one of your own racks, maybe this afternoon. Here’s my process:

    1. Start with Power: Pick one critical server. Does it have two power supplies? Good. Now, physically trace both power cords. Does one connect to a PDU on the left and the other to a PDU on the right? If both land in the same unit, you’ve found your first job.
    2. Move to Network: Trace the network cables from that same server. Are there at least two? Do they go to two different Top-of-Rack switches? This is what you’re looking for.
    3. Step Back and Look: Is the cabling neat and clearly labeled? Can you find the documentation for this rack’s layout in under 60 seconds?

    These are the simple, physical checks that define a truly resilient system.

    Tying It All Together

    If there’s one thing to take away from our discussion today, it’s that true resilience requires thinking beyond the server. It means looking at the entire rack as an ecosystem. The most common single points of failure are rarely in the software; they’re in the fundamental infrastructure.

    We’ve covered the single PDU that takes down a rack of otherwise redundant servers and the single top-of-rack switch that creates an island. The solutions, as we’ve discussed, are about discipline and design: implementing proper A/B power from separate sources and using dual, independent network switches for every rack. These are the practices that separate a fragile system from a truly robust one.

    Thank you so much for joining me for Episode 27! I really appreciate your time and attention.

    Join me next time for Episode 28, where we’ll get into one of the most important concepts in our field: ‘What ‘Five Nines’ Really Means: Calculating Uptime and Its Business Impact’.

    As always, I’d love to hear from you. Have you ever been bitten by a hidden SPOF? Share your stories or questions in the comments below!

  • Episode 26: Why ZFS is Your Secret Weapon for Zero Downtime 

    Hello and welcome back to the blog! I’m so glad you’re here.

    For decades, one technology has been whispered in data centers with a certain reverence, synonymous with uncompromising data integrity: ZFS. It has a legendary reputation, and for very good reason. But in our modern world, dominated by cloud-native solutions and hyper-scale storage, you might be wondering if it’s still relevant.

    My position? It’s more critical than ever.

    When we talk about architecting a truly resilient, self-healing system—one that can withstand failure without waking you up at 3 AM—we have to begin at the most foundational level: the data itself. To help us unpack this, I recently sat down with someone who has built some of the most robust storage platforms in the world, Dr. Elena Vance. She’s a renowned ZFS Storage Architect, and her insights on why the principles behind ZFS are not just history, but the future of reliable infrastructure, were just too good not to share with you all.

    Let’s dive into why this old-school legend is the key to your future-proof architecture.

    The Magic Isn’t Magic: It’s Copy-on-Write

    People often talk about ZFS in almost mythical terms. When I asked Elena about the architectural ‘magic’ that makes it so resilient, her answer was incredibly simple and profound.

    The magic isn’t a single feature; it’s the foundation everything is built on: copy-on-write (CoW). Here’s the core principle: ZFS never, ever overwrites active data.

    Let me paint a vivid picture for you. Imagine you’re editing a critical document. Instead of changing the original, you make a copy, make your changes on that copy, and only once you hit ‘save’ does the system instantly swap the new version for the old one. If your computer crashes mid-edit, the original document is still there, perfectly untouched.

    That’s exactly what ZFS does for every single block of data. When a block is changed, it writes a brand new block and then updates the metadata to point to it, all as a single, atomic transaction. If power fails mid-write, the old data is still perfectly intact. This, combined with end-to-end checksums that verify every block on read, means ZFS doesn’t just prevent corruption—it actively detects and corrects silent degradation over time. As Elena put it, it makes data corruption a solved problem, which should be the absolute baseline for any zero-downtime promise.

    The Instantaneous Time Machine: Snapshots and Clones

    This transactional model leads directly to two of ZFS’s most famous features: snapshots and clones.

    Because ZFS never overwrites data, a snapshot isn’t a time-consuming, full-volume copy like in traditional systems. It’s just a read-only marker… a list of pointers to the data blocks as they existed at that exact moment. This means they are truly instantaneous, and they consume almost no space when you create them.

    This completely changes the game for data protection. You can implement incredibly aggressive schedules. In mission-critical environments I’ve designed, taking snapshots every five or ten minutes provides a level of rollback capability that traditional nightly backups simply can’t touch.

    But the real operational superpower, the part that transforms workflows, comes from clones. You can take one of those snapshots—perhaps of a live production database—and instantly provision a fully writable, independent copy from it. Suddenly, your development team has an up-to-the-minute, full-scale environment to test a critical patch, completely isolated from production. It radically improves the speed and safety of your entire development lifecycle.

    Winning the War Against the “Write Hole”

    This brings us to a fundamental architectural decision: choosing between a traditional hardware RAID card and ZFS’s own software-based RAID-Z. The key difference lies in a scary, and painfully common, vulnerability known as the ‘RAID write hole’.

    With a hardware card, a sudden power loss during a write can corrupt your parity data, silently. You won’t know your data is damaged until you try to restore from it, which is the worst possible time to find out. ZFS’s copy-on-write model makes this impossible. The transaction is atomic, which completely eliminates that risk.

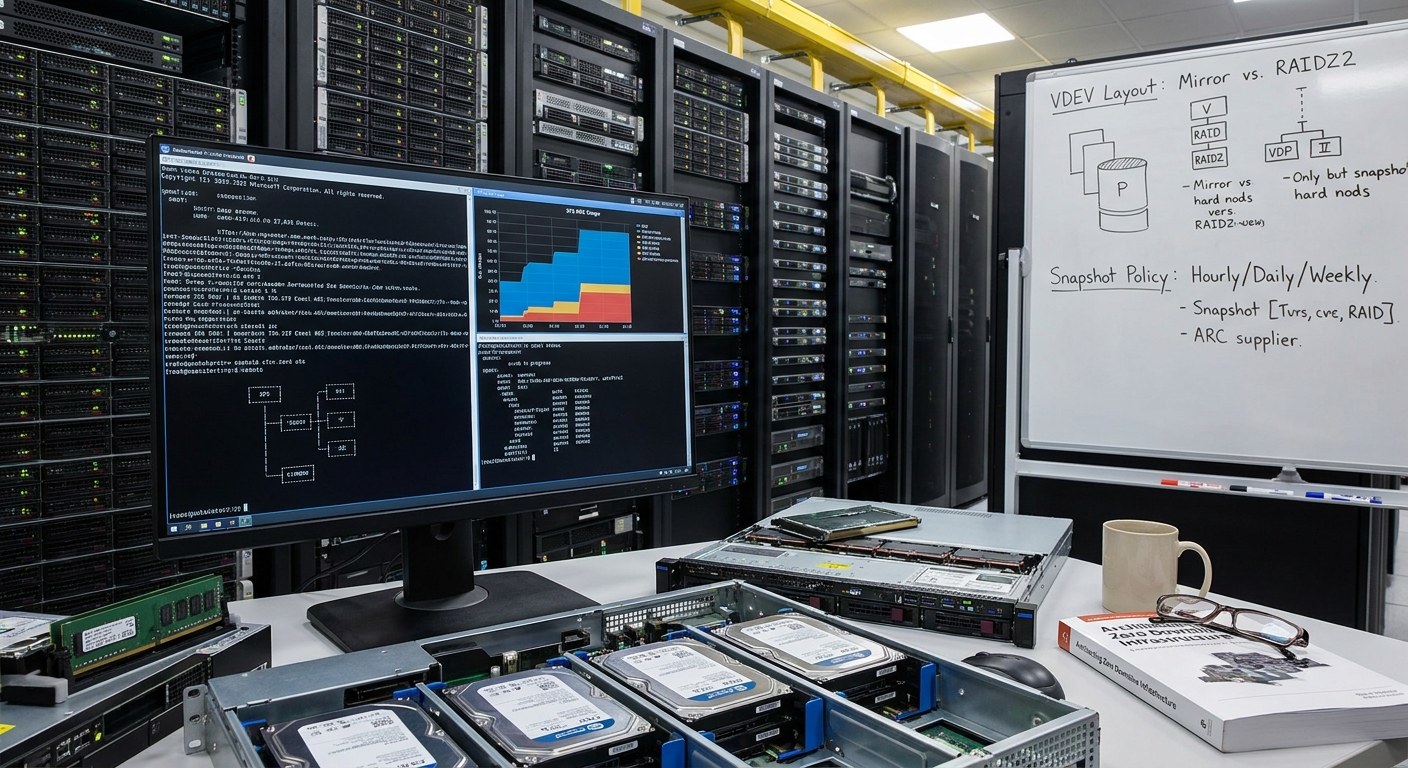
    When I design these systems, I always focus on rebuild time as the key metric for availability. Today’s drives are massive, and resilvering (rebuilding) a failed drive can take many hours, or even days. During that time, your array is vulnerable. That’s why my personal rule of thumb is that RAID-Z2 (dual parity) is the absolute baseline for any serious workload. A single-parity RAID-Z1 is just too risky when a second drive failure during a long resilver could take out your entire pool.

    The Ultimate Hypervisor: ZFS for VMs and Containers

    This is where ZFS moves from being a robust file server to the backbone of modern infrastructure. For virtualization and containers, the design is almost perfect.

    My unbreakable rule here is to place each virtual machine or container into its own ZFS dataset. This isn’t just for organization; it gives you a separate, logical file system for each workload. You can set unique snapshot schedules, compression algorithms, or quotas on a per-VM basis. It provides an incredible level of granular control.

    But the performance story is what really seals the deal. ZFS uses a very sophisticated read cache in RAM called the ARC (Adaptive Replacement Cache). In a hypervisor with plenty of memory, this ARC becomes enormous and intelligently caches the ‘hot’ data from all your virtual machines. The result? A huge percentage of read I/O is served directly from system memory, which is orders of magnitude faster than any storage device. You might be surprised to find that a properly tuned ZFS system with a large ARC on spinning disks can often outperform an under-provisioned all-flash array. It’s an amazing way to build extremely high-performance systems cost-effectively.

    Your Bulletproof Disaster Recovery Plan, Built Right In

    Elena called this next feature a superpower, and that’s not an exaggeration. The feature is zfs send and receive, and it transforms ZFS from a single-site solution into the cornerstone of a complete disaster recovery strategy.

    What I find most elegant about it is its efficiency. It doesn’t copy files; it sends a stream of the actual data blocks that have changed between two snapshots. Here’s a robust architecture I love to see in practice:

    1. Take a snapshot every five minutes on your production system.
    2. Use zfs send to calculate the precise delta—just the new data—and stream it to a warm standby server at your DR site.

    This creates a continuous, low-bandwidth stream of incremental updates. It means your Recovery Point Objective (RPO) isn’t measured in hours, but in minutes. You’re achieving true business continuity without saturating your network.

    Three Mistakes That Will Wreck Your ZFS Build

    Of course, building a system correctly is one thing, but avoiding common pitfalls is another. I asked Elena about the architectural mistakes she sees most often, and her answer was crystal clear. Please, avoid these!

    • Putting a hardware RAID card between ZFS and the disks. This is a fundamental conflict. You want a simple Host Bus Adapter (HBA) that gives ZFS direct control. A RAID card tries to be clever and fundamentally undermines ZFS’s end-to-end data integrity.
    • Underestimating the need for RAM. ZFS is built around its memory cache, the ARC. Skimping on memory is the single most common cause of poor performance, especially if you plan to use the powerful, but memory-hungry, deduplication feature.
    • Improper vdev design. Creating one giant RAID-Z pool is fine for streaming media, but it’s the wrong tool for a high-transaction database. For high IOPS workloads, I always design pools built from multiple mirrored vdevs. It’s all about matching the storage layout to the specific workload.

    What’s Next? The Future is Self-Healing

    And ZFS isn’t standing still. The OpenZFS project is incredibly active, and some of the upcoming features are genuinely transformative.

    I’m watching dRAID (Distributed Spare RAID) most closely. On today’s petabyte-scale arrays, resilvering can take days—a significant window of risk. dRAID changes this by distributing parity and spare capacity across all drives, leading to dramatically faster rebuilds. It’s a game-changer for availability.

    Innovations like this, and others like block cloning for virtualization efficiency, cement ZFS’s role not just as a file system, but as a foundational building block for the future of software-defined storage and hyper-converged infrastructure.

    The Bedrock of Resilience

    The key architectural takeaway for me, and for you, is this: stop thinking of ZFS as merely a file system. As we’ve discussed today, it’s a complete platform for data integrity and availability. Its foundational design—copy-on-write, transactional updates, end-to-end checksums—these aren’t just features. They form the very bedrock on which you can build truly resilient systems.

    And that, my friends, is the ultimate goal.

    That’s all we have time for today. We’ve been deep inside the logical architecture, but resilience is often undone by the physical infrastructure we take for granted. Join me next time for Episode 27: The Single Point of Failure Hiding in Your Server Rack. We’ll move from software to steel, examining the overlooked threats from power distribution units to network backplanes. It’s an area that’s often neglected until it’s far, far too late.

    Until then, thank you for reading. I’d love to hear your thoughts or questions in the comments below!

  • Episode 25: Eight ZFS Pitfalls That Can Wreck Your Data

    Hello and welcome back to Architecting Zero Downtime Infrastructure! I am so glad you’re here.

    Today, we’re diving into a topic that’s absolutely critical for anyone who’s serious about their storage: the most common ZFS pitfalls and, more importantly, how you can gracefully sidestep them.

    Now, so many of us turn to ZFS for its sterling, well-earned reputation for data integrity. And for good reason! It’s an exceptionally powerful tool—a combined file system and logical volume manager that can form the bedrock of an incredibly resilient system. Think of it as a master-crafted vault for your data.

    But here’s the thing: that robustness isn’t automatic. The vault door doesn’t lock itself. I’ve seen brilliantly designed systems falter because of simple, painfully common mistakes made right at the setup stage. To truly build a storage backend capable of that mythical zero downtime, we need to understand not just its strengths, but the subtle ways it can be misconfigured.

    So today, let’s walk through those common errors together. We’ll turn potential disasters into moments of deliberate, expert design.

    Pitfall #1: The Risky RAIDZ1 Gamble

    Let’s start at the very foundation: your pool and VDEV layout. This is the first, and perhaps most fundamental, place where things can go wrong.

    A mistake I see all too often is using RAIDZ1—a single-parity RAID—with today’s massive capacity drives. On paper, it seems fine. But the problem isn’t the theory; it’s the cold, hard physics of resilvering.

    Let me paint a vivid picture for you. One of your 16TB drives fails. The resilver process kicks off, and ZFS begins the monumental task of rebuilding all that data onto a spare. With a drive this large, that process can take not hours, but days. Throughout that entire high-stress period, your array is flying without a net. It’s in a degraded state, and the intense I/O of the rebuild puts extra strain on the remaining drives. The risk of a second drive failure during that window becomes uncomfortably high. And if that happens? Your data is gone.

    My personal rule of thumb is this: Match the architecture to the workload from day one.

    • For anything requiring high IOPS—think databases or virtual machine storage—I build my pools from mirrored VDEVs. Performance is fantastic, and rebuilds are lightning-fast because ZFS just needs to copy data, not perform parity calculations.
    • For large archives where sheer capacity is king, RAIDZ2 (dual parity) or even RAIDZ3 (triple parity) is the only responsible choice. It gives you the breathing room you need to survive a drive failure during a long resilver.

    Pitfall #2: The Permanent ‘ashift’ Performance Tax

    This next pitfall is one of the most damaging because once you make it, it’s completely irreversible without destroying the pool and starting over. I’m talking about a tiny setting called ashift.

    Think of ashift as the fundamental contract between ZFS and your physical hard drives. It tells ZFS the underlying physical sector size of the disks. For years now, virtually all drives have been manufactured with 4-kilobyte (4K) sectors. The correct ashift value for these drives is 12 (because 2^12 = 4096 bytes, or 4K).

    But if you let ZFS guess, or use an old default, it might set ashift=9 (2^9 = 512 bytes). When this mismatch happens, you introduce a severe read-modify-write penalty. For every single block ZFS writes, the drive has to read the entire 4K physical sector, modify the little 512-byte chunk it cares about in memory, and then write the entire 4K sector back to the disk. Your performance is permanently crippled from day one.

    My unbreakable rule: When creating any new pool, explicitly set ashift=12. It’s a one-time command that prevents a lifetime of regret.

    Pitfall #3: Letting the ARC Get Too Greedy

    Let’s talk about memory. ZFS is brilliant at using RAM to accelerate performance, primarily through its Adaptive Replacement Cache, or ARC. It’s an incredibly effective read cache that keeps your hot data ready for instant access.

    But here’s the trap: its default behavior can be… well, a little aggressive. By default, the ARC will try to consume nearly all of your system’s unused memory. On a dedicated storage appliance, this is often exactly what you want! But on a server that’s also running virtual machines, Docker containers, or critical databases, this can be a disaster waiting to happen. I’ve seen systems grind to a halt because the ARC starved other applications of memory, forcing the OS to swap heavily to disk and defeating the whole purpose.

    My process is simple and deliberate: Analyze the system’s overall memory needs and set a sensible upper limit for the cache using the zfs_arc_max setting. This ensures you get the amazing performance benefits of the ARC without compromising the stability of the entire machine. It’s about making your services play nicely together.

    Pitfall #4: The ‘Set It and Forget It’ Scrub

    One of the most powerful features of ZFS is its ability to detect and correct silent data corruption—what we affectionately call “bit rot.” But this self-healing capability isn’t magic; it needs to be actively engaged.

    The pitfall here is simply assuming it’s all happening automatically. A ZFS “scrub” is the process that reads every block of data and verifies its checksum against the metadata. It’s the only way ZFS can find and fix latent errors. I’ve seen teams either never schedule a scrub or, almost worse, they run one but never check the results. This leaves the system completely blind to developing issues.

    What I like to see is disciplined automation. Setting up a recurring scrub—monthly is a very sensible interval—is an essential piece of data hygiene. But running it is only half the battle. The real key is integrating its output into your wider monitoring platform. Whether it’s Prometheus, Nagios, or a simple script that emails you, you need alerts triggered from the output of a zpool status check. That way, when ZFS finds and corrects an error, it’s not a silent event; it’s an actionable notification that prompts you to check your hardware.

    Pitfall #5: The Pool Expansion Misconception

    This one catches so many people by surprise. The fundamental mistake is assuming you can simply add one new drive to an existing RAIDZ vdev to increase its capacity, like you might with other RAID types. In ZFS, you cannot. A RAIDZ vdev’s geometry is fixed once it’s created.

    So, what’s the right way to grow a pool? You have two main options:

    1. Add an entirely new VDEV. This is my preferred method for significant growth. If you started with a six-disk RAIDZ2, you add another six-disk RAIDZ2 to the pool. Your total capacity grows, and performance often improves as ZFS stripes data across both vdevs.
    2. Replace every disk, one by one. You can replace each drive in an existing vdev with a larger-capacity drive. You replace one, wait for it to resilver, then move to the next. Once the final drive is replaced and resilvered, the new, larger capacity magically becomes available.

    Both methods work, but they underscore a critical point: plan for your future needs from the very beginning. Think about how you’ll expand before you even create the pool. This foresight is the mark of a true storage architect.

    Pitfall #6: Runaway Snapshot Accumulation

    ZFS snapshots are a game-changer. They provide nearly instantaneous, point-in-time, read-only copies of your data with almost no overhead. They are fantastic for backups and rollbacks.

    But their very ease of creation leads directly to our next pitfall: chaotic, unmanaged accumulation. I’ve seen systems where an automated tool was set to take snapshots every fifteen minutes… and then was completely forgotten. These snapshots consume space that is hidden from a simple df command. Eventually, and often at the worst possible moment, the pool fills up, and applications start failing with cryptic “no space left on device” errors.

    My solution is a disciplined, automated retention policy. A tiered strategy works beautifully. For example:

    • Keep hourly snapshots for the last 24 hours.
    • Keep daily snapshots for the past 7 days.
    • Keep weekly snapshots for the past month.

    Tools like sanoid or zfs-auto-snapshot can automate this pruning. This gives you granular recovery options for the recent past without letting old data quietly consume your entire pool. It turns snapshots from a potential liability back into the powerful asset they are.

    Pitfall #7: The Non-ECC RAM Gamble

    This pitfall moves from software into the hardware itself. ZFS is phenomenal at guaranteeing the integrity of your data once it’s on the disk, using checksums to protect against bit rot.

    But it operates on one fundamental assumption: that the data it receives from system memory is correct.

    Without Error-Correcting Code (ECC) RAM, there is a gaping hole in that chain of trust. A random bit-flip in memory—and they do happen—can corrupt your data before it ever reaches ZFS. The file system will then dutifully take that corrupted data, calculate a perfectly valid checksum for it, and write it permanently to your pool. The corruption is now baked in, and worse, ZFS trusts it implicitly.

    For any system where the data truly matters, my stance is uncompromising: use ECC RAM. It is the only way to ensure genuine end-to-end data integrity, from your application all the way to the physical platters.

    Pitfall #8: The One-Size-Fits-All ‘recordsize’

    Our final pitfall is a subtle but significant performance killer: using the default recordsize for every workload. By default, ZFS uses a 128K recordsize, which is fantastic for large, sequential files like videos or backups.

    But what happens when you run a database on that same dataset? A database typically works with much smaller blocks, say 8K or 16K. When the database requests a tiny 16K block, ZFS is forced to read an entire 128K block off the disk just to service that small request. This is called read amplification, and it’s a huge waste of I/O.

    My process involves a more granular approach. ZFS makes it trivial to create different datasets for different workloads within the same pool.

    • For my database, I’ll create a dedicated dataset and set recordsize=16K.
    • For my virtual machine images, perhaps recordsize=64K.
    • For a large media archive? The default 128K is probably perfect.

    You’ll find that matching the recordsize to your application’s I/O profile is one of the most effective performance tunes you can make.

    Your Foundation for Dependability

    And that brings us to the end of our tour through the ZFS minefield! From choosing the right VDEV layout to tuning record sizes, getting these details right is what transforms ZFS from a powerful tool into a genuinely resilient, high-performance storage platform. This is the real groundwork for dependability and zero downtime.

    Thank you for joining me today. I hope this gives you the confidence to build your next ZFS system like a pro.

    Join us next time for episode twenty-six, ‘A Deep Dive with a ZFS Storage Architect,’ where I’ll be speaking with an industry expert about how they apply these very principles in massive, real-world deployments. It’s going to be a fantastic conversation.

    Until then, happy architecting! Let me know your own ZFS stories or questions in the comments below.

  • Episode 24: Why ‘Free’ Linux Storage HA Costs Your Weekend

    Hello and welcome back to Architecting Zero Downtime Infrastructure! I am so glad you’re here with me today.

    We’ve all been there, right? Staring down a project budget, looking for ways to deliver powerful, resilient systems without that hefty license fee. The open-source community is a wonderland of remarkable tools, especially for High Availability (HA) storage. But I’ve learned over the years that ‘free’ is rarely a simple proposition.

    While you aren’t writing a check to a vendor, the real invoice can arrive in other ways… in the form of your time, your team’s sanity, and—most critically—your company’s uptime. So today, we are going to have a very practical, very honest discussion about the total cost of ownership for do-it-yourself HA storage.

    The Allure of ‘Free’ (And the Catch)

    When we talk about this space, a few big names always come up. For straightforward two-node replication, you have technologies like DRBD, which you can think of as a sort of networked RAID 1—it mirrors a block device from one server to another. Then you have the larger, more distributed file systems like GlusterFS and Ceph, designed for serious, web-scale infrastructure.

    The initial appeal is undeniable. There’s no license fee. You aren’t locked into a specific hardware vendor. And there’s a vast community of brilliant people you can turn to for advice. But this is where we need to make a critical distinction. There’s ‘free as in beer,’ and then there’s the reality of the expertise, the planning, and the sheer human effort required to make these systems truly robust.

    What you quickly find is that these tools trade a financial cost for an operational one.

    The Split-Brain Nightmare: A DRBD Deep Dive

    Let’s use DRBD as our first practical example. As I said, its core function is very elegant—it’s essentially a ‘networked RAID 1’. Any block of data written to the primary node is synchronously replicated to the secondary node over a dedicated network link. It’s clean, it’s fast, and it works.

    But this elegant simplicity introduces the single most dangerous failure state in any high-availability architecture: the ‘split-brain’ scenario.

    Let me paint a vivid picture for you. Imagine the dedicated network link between your two servers fails. It could be a bad cable, a faulty switch port, anything. But here’s the kicker: both servers are still running perfectly. Each node can no longer see its partner, so each one logically concludes the other has crashed. If your system is configured for automatic failover, both nodes will attempt to assume the primary role. They both believe they are the sole survivor… the active master.

    At that point, both servers are accepting write operations independently. You now have two divergent, conflicting timelines for your data. When the network link is eventually restored, the system has no safe, automatic way to merge them. That, my friends, is the very definition of data corruption.

    And please believe me, this isn’t some obscure edge case; it is the fundamental challenge you must solve in any two-node cluster.

    My Unbreakable Rule: You Must Fence Your Nodes

    So, how do we prevent this digital horror story? The only reliable way to solve the split-brain problem is a technique called fencing. And its most common implementation has a rather memorable acronym: STONITH, which stands for ‘Shoot The Other Node In The Head’.

    The logic is as brutal as it is absolute. Before a standby node promotes itself to primary, it must have an absolutely guaranteed way of ensuring the other node is dead and gone. I’m not talking about a graceful shutdown request… I mean a hard, immediate, indisputable power-off.

    This is often where the hidden costs begin to surface. This isn’t just a software setting. My unbreakable rule is that you must have a true out-of-band management path. This means something like a server’s IPMI or iDRAC port, or even a network-connected smart PDU (Power Distribution Unit). This is the non-negotiable component. Skipping this step to save a few dollars or a bit of complexity is probably the most common—and the most fatal—mistake I see in DIY high-availability setups.

    The Complexity of Scale: Ceph and GlusterFS

    Now, if we move beyond simple two-node setups, we get into the world of large-scale solutions like Ceph and GlusterFS. And make no mistake, these are immensely powerful, impressive pieces of engineering. You can use them to build petabyte-scale, self-healing storage platforms that can grow almost indefinitely.

    But this is where the operational complexity can become… well, notorious.

    What I often find is that the learning curve for deploying, and more importantly, tuning these systems is exceptionally steep. One day you’re a sysadmin, and the next you’re deep in the weeds of CRUSH maps in Ceph to precisely control data placement, or you’re troubleshooting subtle network performance issues between dozens of nodes. These are not ‘install and forget’ systems. When you choose this path, you’re effectively taking on the role of a storage vendor. You are building and operating a complex distributed system, and that requires a very specific and deep level of expertise to run reliably.

    The Lost Weekend: A Painfully Common Story

    Let me tell you a story that I find happens far too often.

    It’s a Thursday, and a sharp, capable administrator sets up a ‘free’ HA cluster. They follow the guides, run all the tests, pull the network cables, and the failover works exactly as documented. It looks perfect. High-fives all around.

    Then, Friday at 5:30 PM, a core switch for the replication network has a minor fault. A simple glitch. But the cluster doesn’t behave as it did in the sterile lab environment. The automatic failover fails to trigger, or worse, it triggers incorrectly and both nodes decide they are the primary.

    Now, instead of heading home for the weekend, that administrator is spending their Saturday morning deciphering obscure log files, trying to manually force a failover, and validating data block by painful block to ensure nothing was corrupted.

    That lost weekend, that pit in your stomach, that is the true, unbudgeted cost of ‘free’.

    The 2 AM Question: Who Do You Call?

    The community support model is fantastic… for certain things. When you’re learning, when you’re testing a configuration, or when you have a non-urgent question, mailing lists and forums are an incredible resource filled with generous experts.

    But you have to ask yourself the hard question: what is your support model when it’s two in the morning, your entire production environment is down, and the clock is ticking?

    You might find that posting a desperate plea to a forum and hoping for a timely answer is not a viable business continuity plan. This is the paradox I see so often. To make these ‘free’ solutions genuinely enterprise-ready, companies frequently end up buying enterprise support from vendors like Red Hat or SUSE anyway. You’re effectively paying to put a safety net under the free software, because when everything is on the line, what you truly need is a phone number to call and a guaranteed response time from an expert who has seen this problem a thousand times before.

    Calculating the Real TCO

    Having laid out all those warnings, I don’t want to suggest these tools have no place. They absolutely do, but the choice must be deliberate and appropriate.

    My personal rule of thumb is this:

    • Development and testing labs? An excellent choice. The stakes are lower, and it’s a fantastic environment for your team to build valuable skills.
    • Non-critical workloads? Sure, if a few hours of downtime for troubleshooting isn’t a catastrophic business event.
    • The sweet spot? I see them succeed most consistently in organizations that have a dedicated team of deeply skilled Linux and storage engineers. These are companies that effectively decide to treat their storage platform as an in-house developed product. They have the staff, the expertise, and the culture to manage that complexity.

    In the end, the choice isn’t just about the software; it’s about the human resources you can commit to it. So let’s properly calculate the real Total Cost of Ownership. What I always push for is an analysis that goes far beyond the software license (which is zero).

    1. Engineer’s Time: Not just for the initial setup, but for the ongoing care, feeding, patching, and emergency troubleshooting.
    2. Specialist Hardware: The dedicated 10-gigabit networks for replication, and the essential out-of-band management cards we discussed.
    3. Formal Training: To get your team up that steep learning curve.
    4. The Big One: The potential business cost of downtime, which is the hardest to quantify until it’s too late.

    When you add all of this up, you might find that a fully-supported commercial solution isn’t just about reducing risk. In many cases, it’s simply the more financially sound decision from day one.

    It’s a Trade, Not a Savings

    The key message I’d like you to take away today is that choosing ‘free’ storage HA is not truly about saving money. It’s about making a conscious trade. You are exchanging a predictable capital expense for the less predictable operational costs of your engineers’ time, the need for very deep expertise, and a different, often higher, level of operational risk.

    Before you choose your path, my advice is to perform a thorough, honest TCO analysis. Look beyond the sticker price and be realistic about what your team and your business can truly support.

    Speaking of powerful tools that demand that kind of expertise to avoid problems… that brings us neatly to our next episode. Join me next time for Episode 25: ‘Common ZFS Pitfalls and How to Avoid Them’, where we’ll learn how to sidestep the traps in this truly remarkable, but often misunderstood, filesystem.

    Thank you for listening, and I can’t wait to see you in the next one. As always, leave your questions and comments below—I read every single one!

  • Episode 23: Building a Bulletproof Video Editing SAN

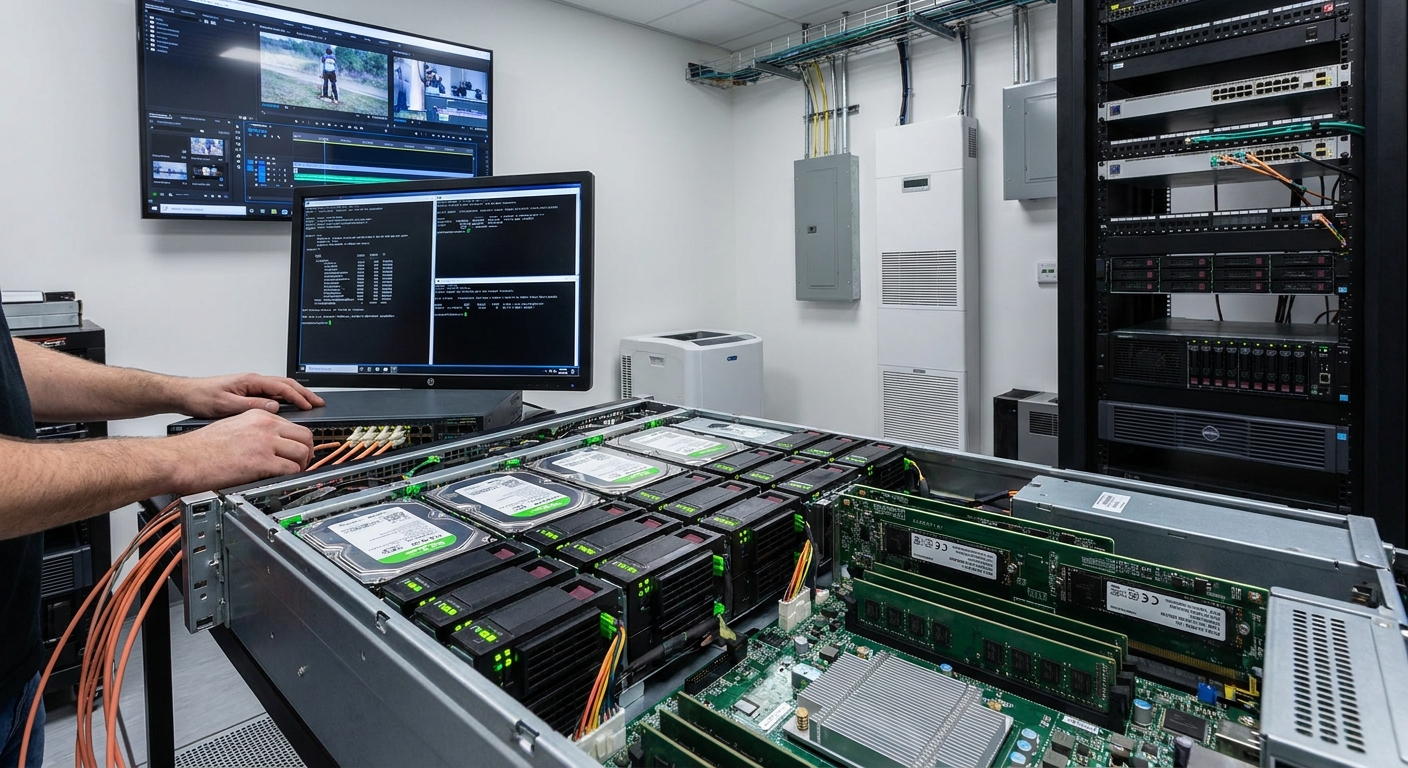
    Hello and welcome back to ‘Architecting Zero Downtime Infrastructure’! I am so excited for today’s episode because we get to move from the drawing board to the real world. We’re rolling up our sleeves and diving deep into a practical, end-to-end case study: building a ZFS-based Storage Area Network (a SAN) from the ground up for a professional video production house.

    Now, let me paint a vivid picture for you. Designing storage for video production is like building a custom engine for a Formula 1 car. You need absolutely massive throughput to handle multiple streams of 4K and 8K RAW footage simultaneously. You need exceptionally low latency, because for an editor, a single dropped frame is a total deal-breaker. And most critically, you need absolute, non-negotiable data integrity. Their footage isn’t just data; it’s their entire business.

    We’re going to walk through the entire journey together—from the initial business problem they faced, through the design choices we made, the specific hardware and network architecture, the implementation itself, and finally, the incredible impact it had on their business. Let’s get started.

    The Sneaker-Net and The Silent Killer

    So, let’s meet our client. They were a successful, mid-sized video production house, but their creative flow was being absolutely strangled by their technology. Their storage situation was what I’d generously call a patchwork quilt of problems. A chaotic mix of individual NAS boxes, direct-attached drives hanging off each workstation… it was a mess.

    This led to what we in the industry painfully refer to as a ‘sneaker-net’ workflow. Imagine editors physically copying terabytes of footage from machine to machine on portable hard drives. It’s slow, it creates version control nightmares (“Wait, is this the final color grade or was it on the other drive?”), and it causes huge bottlenecks during rendering. But the real issue, the one that kept the owners up at night, was the risk. There was no centralized backup, no single source of truth. Their most valuable asset was scattered and vulnerable.

    And lurking in the shadows was the silent killer we call bit rot—the gradual, undetectable corruption of data over time. A single flipped bit in a project file or a piece of RAW footage could render weeks of work completely useless. Their entire library was living on a prayer, and they knew they couldn’t scale their business on prayer alone.

    Our Champion: Why ZFS Was the Only Real Choice

    The first question is always, “Why an open-source solution like ZFS instead of a big, shiny, expensive box from a proprietary vendor?” It’s a perfectly valid question, and for me, the answer lies in its fundamental design philosophy. ZFS was engineered from its very DNA to guarantee data integrity.

    What I find so powerful is its copy-on-write architecture combined with end-to-end checksumming. Think of it this way: every time you save a file, ZFS doesn’t just overwrite the old data. Instead, it writes the new data to a brand-new spot on the disk and then updates the map to point to this new location. It’s inherently safer, like never editing an original document, only revised copies.

    And the checksum? It’s like a unique digital fingerprint for every single block of data. When you write data, ZFS creates a fingerprint. When you read it back—even years later—it checks the fingerprint. If it doesn’t match, ZFS knows instantly that corruption has occurred and, here’s the magic, it can automatically repair the data using its redundant copies (from the RAID configuration). This self-healing capability is what provides true peace of mind. It’s not just hoping your data is safe; it’s a system that actively verifies and protects it, every second of every day.

    Laying the Foundation: Hardware is Not an Afterthought

    For a build like this, everything starts with a rock-solid foundation. We can’t build a skyscraper on sand.

    • The Chassis and Drives: We went with a high-density 4U chassis, which gave us plenty of room to grow. We populated it with enterprise-grade Nearline SAS drives. Crucially, we configured these drives in multiple RAID-Z2 pools. This means each group of drives can tolerate two complete drive failures with zero data loss. Splitting the total capacity into several of these smaller pools, instead of one giant one, also gave us a fantastic performance boost by spreading out the I/O operations.
    • The Brains of the Operation (Server Specs): The server itself is the heart of the SAN. My unbreakable rule here is that ECC memory is non-negotiable. ECC (Error-Correcting Code) memory is like having a vigilant proofreader for your computer’s short-term memory, preventing silent memory errors from ever being written to your precious disks.
    • The Magic of Caching: My personal rule of thumb is to have at least 1GB of ECC RAM for every 1TB of raw storage. This feeds ZFS’s amazing primary read cache (the ARC). To supercharge it, we used high-speed NVMe flash for two very specific jobs: a large L2ARC (a secondary read cache) for frequently accessed files, and a dedicated SLOG device. The SLOG is vital; it acts as an incredibly fast landing zone for small, synchronous writes—like the constant project file saves that video editing software performs—ensuring every click of the ‘Save’ button is instantly and safely committed to storage.

    Building the Superhighway: The Network

    A high-performance server is useless if it’s connected to the workstations by a dirt road. The studio’s existing 1-gigabit network was an immediate bottleneck. It was like trying to drain a swimming pool through a drinking straw. A full overhaul was our first order of business.

    We implemented a dedicated 10-gigabit switched infrastructure, creating a superhighway connecting the new SAN directly to every editing suite. For the protocol, I almost always choose iSCSI in these environments. It gives you the raw, block-level performance editors need (making the network storage feel like a local drive), but it runs over standard TCP/IP, which is far simpler and more cost-effective to manage than something arcane like Fibre Channel.

    One of the first tuning steps I always take is enabling Jumbo Frames across the entire path. This simple change allows the network to send data in much larger packets. Think of it as sending your data in bigger trucks, which means fewer trips, less overhead, and a significant boost in real-world throughput. It ensures the network is never the weak link in the chain.

    The Implementation Journey: Where the Magic Happens

    The journey from blueprint to reality is never a straight line. The first major hurdle was a delicate surgery: migrating over 100TB of live project data with minimal disruption. My go-to process here is a multi-pass approach using a powerful tool like rsync. We did an initial bulk sync over a weekend, then ran smaller, incremental syncs each night to catch the changes, leading up to a tiny final sync at cutover.

    But the real artistry comes in during the post-install tuning phase. This is where you dial in the system for the specific workload. For video, this means tuning the ZFS record size to 1MB to optimize for large, sequential files. It’s about meticulously tweaking the cache behavior and iSCSI parameters, then running playback tests with multiple editors, hunting down and eliminating every single dropped frame. This is the part of the job I love—transforming a powerful machine into a perfectly tuned instrument for creativity.

    The Payoff: Performance, Resilience, and Peace of Mind

    So, what was the result? The transformation was staggering. We measured everything.

    • Before: Moving a typical 500GB project folder took well over an hour.
    • After: That same transfer took less than 10 minutes.

    Benchmarks showed sustained, multi-gigabyte-per-second throughput right to the edit suites. In practical terms, this meant several editors could collaborate on the same complex 4K timeline, in real time, without a single dropped frame. Project load times were slashed by over 75%. The technology finally got out of the way and just worked.

    But performance is only half the story. The real deliverable was resilience. We put a multi-layered strategy in place. First, we leveraged one of ZFS’s most incredible features: snapshots. We configured the system to automatically take a read-only snapshot of the entire filesystem every 15 minutes. This is like having a universal ‘undo’ button. An editor accidentally deletes a critical folder? A project file gets corrupted? No problem. We can roll back to a perfectly clean version from just a few minutes ago, instantly.

    For true disaster recovery, we used the native zfs send/recv command to replicate the entire dataset, including all those wonderful snapshots, to a secondary server at an off-site location every night. This gives them complete business continuity. If something catastrophic were to happen to the main studio, their entire business—every project, every file—is safe.

    Beyond the Tech: The Real Business Impact

    When we looked at quotes for proprietary systems that could deliver similar performance, the total cost of our custom ZFS solution was 3 to 4 times lower. That’s a massive ROI right out of the gate. But the real value was in the workflow. By removing the technological friction, we enabled true, real-time collaboration.

    The new centralized system dramatically accelerated their project turnarounds, which had a direct commercial benefit: the studio was able to take on more clients and bigger projects without increasing headcount. But ultimately, the biggest benefit isn’t a number you can put on a spreadsheet. It’s the total peace of mind they now have in the integrity and availability of their core business asset.

    Final Thoughts

    What I hope this case study has made crystal clear is that a properly engineered open-source solution can absolutely deliver performance and data integrity that meets or even surpasses proprietary systems, especially in demanding environments. The secret, if there is one, is holistic planning. It’s about ensuring the hardware, the networking, and the software tuning are all working together in perfect concert.

    Today, we celebrated a success story. But it’s just as important to learn from what happens when things go wrong. I hope you’ll join me next time for Episode 24, where we’ll explore some cautionary tales. We’re calling it, “The ‘French’ Alternatives: Why Free Linux Storage HA Can Cost You Your Weekend.”

    Thank you for joining me on this deep dive! As always, I love hearing from you. Drop your questions or comments below, and I’ll see you next time.

  • Episode 22: ZFS Encryption: Your Data’s Built-In Bodyguard

    Hello and Welcome Back!

    Hello and welcome back to Architecting Zero Downtime Infrastructure! I’m so glad you could join me today. We’re diving into a topic that, in my book, is simply non-negotiable for any modern enterprise: ZFS native encryption. We’re talking about protecting your data at rest, and doing it the right way.

    Now, we all know the stakes. Regulatory frameworks like GDPR and HIPAA aren’t polite suggestions; they are hard, legally-binding requirements. But even beyond the compliance checklists, there’s a simple, physical reality we all live with. Hard drives get decommissioned. They fail. And sometimes, they get stolen or misplaced. The moment a piece of hardware leaves your physical control, you have to be 100% certain that the data on it is nothing more than unintelligible, useless noise to anyone else.

    What I see far too often are these complex, brittle, layered solutions built to solve this problem. It feels like adding more and more locks to a door that wasn’t very strong to begin with. But what if your filesystem itself—the very foundation of your data—could handle high-performance, military-grade encryption, natively, without the headache of third-party tools? That’s exactly the conversation we’re having today. Let’s get into it.

    What Makes ZFS Encryption Different?

    The first thing you need to understand is that ZFS native encryption isn’t an afterthought. It’s not some feature that was bolted on late in the game. It’s woven directly into the DNA of the filesystem.

    Many of you are probably familiar with systems like LUKS on Linux or BitLocker on Windows. These are fantastic tools, but they operate at the block level. Think of it like putting your entire house inside a giant, opaque shipping container. The container is locked, but inside, everything is just one big, undifferentiated space. Block-level encryption encrypts an entire disk or partition, sitting underneath the filesystem, completely unaware of the data structures above it.

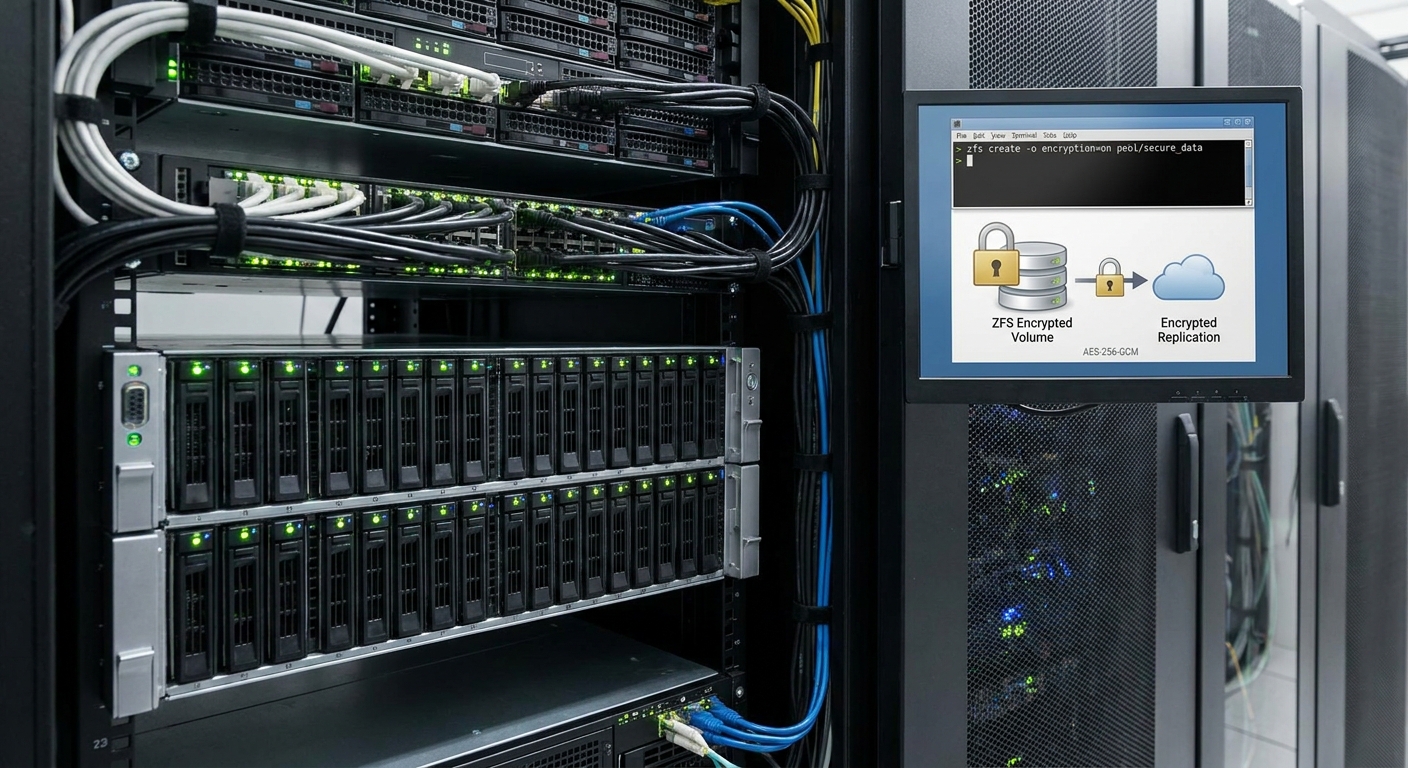
    ZFS takes a fundamentally different and, in my opinion, strategically superior approach. It operates at the dataset level. This is where things get really powerful. It’s less like a giant shipping container and more like a high-security hotel where every single room has its own unique, impenetrable vault. You can have a single ZFS pool where one dataset holding sensitive customer records is encrypted, while another dataset with temporary scratch data is left unencrypted for convenience. You can even use different encryption keys for different projects, all living happily on the same set of disks.

    This granular control is what I find works best in the real world, because it allows you to map your security policies directly to your business needs, rather than making monolithic choices based on your hardware.

    The ‘Big Three’ Advantages: Why I Swear By It

    So, why choose this integrated approach over a more traditional one? For me, it always comes down to three critical advantages.

    1. Performance, Performance, Performance: This is the first question everyone asks, and for good reason! The fear is that encryption will bring your high-speed storage to a grinding halt. With ZFS, this is largely a solved problem. It brilliantly leverages the AES-NI instruction set that’s built right into virtually all modern CPUs. This means the encryption work is done in hardware, at silicon speed. In nearly every deployment I’ve ever built or consulted on, the performance impact is so small, it’s negligible. Your bottleneck will almost certainly be your storage media or your network, not the encryption.
    2. Operational Simplicity: This is where the elegance of the design really shines. Creating a new encrypted dataset is a single command-line flag. It’s clean, it’s simple, and it’s repeatable. There’s no complex setup ritual, no kernel modules to configure, no third-party daemons to manage. This lack of complexity means it’s incredibly easy to adopt and, more importantly, enforce as a standard practice for all new data.
    3. Deep, Seamless Integration: This, for me, is the true power. Because encryption is a native citizen of the filesystem, it works seamlessly with all of ZFS’s other powerhouse features. Snapshots? They just work, and they remain encrypted. Clones? Same deal. Replication? You guessed it—it works transparently. An external encryption tool is blind to all of this; it can’t distinguish a snapshot from regular data. This isn’t just a minor convenience; it’s a fundamental architectural benefit that you will appreciate every single day you manage your system.

    Under the Hood: The Genius of the Key Hierarchy

    To really appreciate the design, we have to peek under the hood at how ZFS manages keys. It’s a beautifully practical three-level system. Let me break it down with an analogy.

    Imagine a secure facility. At the very top, ZFS internally manages a Master Key for the entire pool. This is like the blueprint to the facility’s entire locking system—it’s kept deep inside and you never touch it.

    Next, you have what’s called a Wrapping Key. This is the one you directly control, usually with a passphrase you type in. Think of this as the master keycard that the security chief holds. It doesn’t open individual doors directly, but it grants access to the local key lockboxes.

    Finally, each encrypted dataset has its own specific Data Encryption Key (DEK). This is the key that does the actual heavy lifting of encrypting and decrypting your data blocks. These are the individual keys to each secure room.

    When you mount a dataset, your passphrase unlocks the Wrapping Key (the keycard), which in turn decrypts the specific DEK (the room key) for the data you need to access. Here’s the operational masterstroke: if you need to change your passphrase, you aren’t re-encrypting terabytes of data. You are only re-encrypting that tiny little Wrapping Key. This turns key rotation from a terrifying, weekend-long data migration project into a trivial, seconds-long task. It’s brilliant.

    Putting It Into Practice: Your First Encrypted Dataset

    So, what does this look like in the real world? The command itself is deceptively simple. To create a new, encrypted filesystem, you’d run something like this:

    Bash

    zfs create -o encryption=on -o keyformat=passphrase poolname/my_secure_data

    ZFS will then prompt you for a passphrase, and you’re done. It’s that easy. Now, there are a few key properties you’ll want to know:

    • encryption: You can set this to on or a specific algorithm. My personal rule of thumb is to stick with the default, aes-256-gcm. It’s the modern standard, offering an excellent balance of world-class security and incredible speed.
    • keyformat: This is usually passphrase, but it can also be a raw key file.
    • keylocation: This tells ZFS where to find the key. You can set it to prompt (so you’re asked for it every time) or point to a file path, like file:///path/to/my.key.

    But here’s where the operational efficiency really kicks in: inheritance. Once you encrypt a parent dataset, any new filesystem you create underneath it automatically inherits that encryption policy. Imagine creating a single encrypted dataset for user homes (zfs create -o encryption=on poolname/homes). From that point on, every new user account you provision (zfs create poolname/homes/newuser) is automatically and transparently protected. This is how you make security the default, not the exception.

    Key Management: The Heart of Your Security

    Let’s be frank: your encryption is only as strong as your key management. The keylocation property presents a classic security-versus-convenience tradeoff.

    • Using prompt is the most secure method for an interactive system. It requires a human to physically type in the passphrase at boot or mount time. The key is never stored on disk. The downside? It’s a deal-breaker for unattended servers in a remote data center.
    • Using a key file is far more convenient for automated reboots. However, it shifts the entire security burden onto protecting that one file. If an attacker gets your data disks and that key file, your encryption is worthless. My unbreakable rule here is: if you use a key file, store it on a separate physical device. A common practice is to use a small, removable USB drive that is only plugged in during a reboot and is otherwise stored in a physical safe.

    For larger, multi-tenant environments, ZFS also offers a powerful feature called delegation. Using zfs allow, you can grant specific, non-root users the permissions to load keys, create snapshots, and manage their own encrypted datasets, without giving them the keys to the entire kingdom. This is how you scale security responsibly.

    The Game-Changer: Encrypted Replication

    Now I want to talk about a feature that, in my experience, is criminally overlooked, yet it’s one of the most powerful capabilities in the entire system: raw encrypted replication.

    Normally, when you use zfs send to replicate a dataset to another machine for backups, ZFS will decrypt the data on the source, send the plaintext data across the wire (hopefully over a secure channel like SSH), and the destination will then re-encrypt it. This works, but it means your backup target must have access to your encryption keys.

    There is a much, much better way. By adding a single flag, -w, you create a ‘raw’ send.

    Bash

    zfs send -w poolname/my_secure_data@snapshot | ssh backup-server zfs receive anotherpool/backup

    When you do this, something strategically magical happens. ZFS sends the data blocks in their already-encrypted form. It transmits the ciphertext exactly as it exists on disk. This is a complete game-changer for backing up to a location you don’t fully control, like a third-party cloud provider or a secondary data center. The remote system stores your data, but it holds nothing more than an opaque, encrypted blob. It never sees the keys; it has absolutely no ability to decrypt the data. This is robust, zero-trust security built right into your backup workflow.

    A Final Word on Performance and Pitfalls

    I want to circle back to performance one last time, because it’s such a common concern. On any reasonably modern server hardware with AES-NI support (which is basically anything from the last decade), you should think of ZFS encryption as being effectively ‘free’. For your databases, virtual machines, and file shares, the impact is so low you’ll likely never be able to measure it outside of a synthetic benchmark. Don’t let performance anxiety stop you from implementing this critical security layer.

    Finally, a couple of quick operational pro tips to keep in mind:

    1. You can’t encrypt an existing dataset in place. My process is to create a new encrypted dataset and then use zfs send | zfs receive to migrate the data locally from the old one to the new one. You just need to plan for it.
    2. Practice good key hygiene. If you have a sensitive dataset that you don’t need mounted all the time, get into the habit of running zfs unload-key poolname/my_secure_data. This immediately locks the dataset and flushes the key from memory, ensuring it’s secure until you explicitly mount it again.

    Wrapping Up

    So there you have it. ZFS native encryption is a fast, flexible, and deeply integrated solution for protecting your data at rest. It provides the granular, dataset-level control that modern applications demand, with almost no performance penalty. When you combine that with killer features like raw encrypted replication, you have a truly comprehensive and elegant system.

    It’s security built in, not bolted on. And that makes all the difference.

    Thank you for tuning in today! I hope you’ll join me next time as we put all this theory into practice. In Episode 23, we’ll dive into a full case study: ‘Implementing a ZFS-based SAN for a Video Production House.’ We’ll see how these powerful features come together to solve real-world challenges where performance and data integrity are absolutely paramount.

    I look forward to seeing you then. As always, feel free to leave your questions and comments below!

  • Episode 21: Scaling ZFS from Homelab to Enterprise

    Hello and welcome back to Architecting Zero Downtime Infrastructure! This is episode twenty-one, and today we’re taking a journey that I know many of you will find intimately familiar. It’s a story of growth, evolution, and a fundamental shift in mindset. We’re going from the familiar comfort of the homelab to the high-stakes world of production workloads with ZFS.

    For so many of us, ZFS begins as a passion project. It’s that wonderfully flexible, impossibly powerful tool we set up in a corner of the house to learn, experiment, and safeguard our personal digital lives. But here’s the thing: the principles that make a great homelab don’t always translate directly to the demands of the enterprise. When real money and real business operations are on the line, the entire conversation changes.

    It’s no longer just about protecting our data; it’s about protecting the business. Downtime stops being a minor inconvenience and becomes a direct, and often painful, financial liability. So today, we’re going to walk through how we evolve that ZFS foundation. We’ll explore how to take the brilliance we discovered in our homelabs and engineer it for the unforgiving world of enterprise uptime.

    Our Starting Point: The Wonderful World of the Homelab

    Let’s begin where most of us start our ZFS journey: the homelab. It’s a fantastic environment, one driven by curiosity, a thirst for knowledge, and, let’s be honest, a pretty tight budget.

    What I often see—and what my first ZFS box looked like—is a system built on good consumer hardware. Maybe it’s a repurposed desktop or a custom-built tower, likely humming along with standard, non-ECC memory. The storage array is typically a charming collection of SATA drives, maybe of different sizes, brands, or ages, because the primary goal is maximizing every last gigabyte for personal projects, family photo backups, or that ever-expanding media library.

    The VDEV layout is often a simple, wide RAIDZ1. This makes perfect sense when you’re trying to get the most usable space from the drives you have on hand. It’s a fantastic, cost-effective environment for learning the ropes of ZFS. It’s the ideal sandbox… but it is just that, a sandbox. It was never designed to withstand the pressures of production.

    The Enterprise Mindset Shift: From ‘If’ to ‘When’

    This is where the most critical transformation happens, and it’s not in the hardware—it’s in our heads. The enterprise environment is, by its very nature, unforgiving. We move away from experimentation and into a world governed by contracts and consequences.

    I’m talking about things like Service Level Agreements (SLAs), which are formal, written promises of uptime that we make to our customers or internal departments. We also operate under Recovery Time Objectives (RTOs), which define precisely how quickly a service must be restored to avoid a critical business impact.

    Why the formality? Because in production, downtime is measured in currency. It’s lost revenue, failed e-commerce transactions, a halt in manufacturing operations, and damage to the company’s reputation. And so the core question we ask of our storage system has to change.

    It’s no longer, ‘Can I recover my data after a failure?’.

    The professional question becomes, ‘Can the business continue to operate without interruption?’

    This shift is the ‘why’ behind every stringent hardware choice and design principle we’re about to explore. It’s all about building a system that can meet its obligations, day in and day out.

    Building on Bedrock: Non-Negotiable Hardware Upgrades

    Alright, let’s get our hands dirty and talk about moving from consumer parts to certified, enterprise-grade iron. For me, the first and most critical component is simply non-negotiable.

    My unbreakable rule: Always use ECC RAM.

    Your ZFS ARC cache—the super-fast read cache—lives in system memory. A single, silent bit-flip from standard RAM can introduce corruption that gets written to disk, eventually poisoning your entire pool. ECC (Error-Correcting Code) memory detects and corrects these errors on the fly. It is the absolute foundation of data integrity. Without it, everything else you build is on shaky ground.

    From there, the upgrades cascade through the system:

    • CPUs: We move from consumer CPUs to server-grade processors like Intel Xeons or AMD EPYCs, which are designed for sustained, 24/7 workloads and offer more PCIe lanes for connectivity.
    • Host Bus Adapters (HBAs): Forget the onboard SATA ports. We use redundant SAS HBAs to provide a much more resilient, multi-path connection to our storage shelves.
    • Drives: Consumer SATA drives are replaced with enterprise SAS or NVMe disks. The difference isn’t just about raw speed; it’s about critical features like power-loss protection, which ensures data in the drive’s cache is written to flash in a power outage, and far higher endurance ratings (DWPD, or Drive Writes Per Day).

    Think of it this way: every single component is a potential point of failure. In production, every single one of those points must be hardened.

    VDEV Design: From Maximum Space to Maximum Resilience

    This design philosophy extends directly to how we arrange our drives. That wide RAIDZ1, so beautifully efficient for maximizing space in a homelab, becomes a serious liability in production.

    Let me paint a vivid picture for you. With today’s massive 16TB or 20TB drives, if one fails in a wide RAIDZ1, the time it takes to resilver—to rebuild the data onto a replacement drive—can stretch into days. Throughout that entire, stressful period, your array is in a degraded state, operating with zero redundancy. It’s acutely vulnerable to a second drive failure, which would be catastrophic, resulting in total data loss for the pool.

    It’s a risk we simply cannot afford to take.

    Instead, my process is to tailor the VDEV layout to the specific workload:

    1. For High-Performance Needs: For workloads like databases or virtual machine datastores, a pool of striped mirrors is the only correct choice. The IOPS performance is excellent, and more importantly, rebuild times are incredibly fast because ZFS only has to copy the data from the surviving mirror disk, not calculate parity across many drives.
    2. For Archival & Bulk Storage: For write-heavy archival storage, where capacity and resilience are paramount, RAIDZ2 or even RAIDZ3 is the way to go. This provides the necessary protection against multiple concurrent drive failures, which is a very real possibility during a stressful resilver event.

    This VDEV design is always supported by online hot spares ready to jump in automatically and standardized drive sets that make recovery a predictable, manageable process.

    Beyond the ARC: A Deliberate Caching Strategy

    In a homelab, we typically rely entirely on the ARC, and it’s brilliant. But in production, our caching strategy has to be much more deliberate and layered.

    Sizing the ARC appropriately is still paramount, of course. My personal rule of thumb is to allocate as much RAM as is reasonable for the system. But we can add more specialized layers:

    • L2ARC (Level 2 ARC): This is a secondary read cache built on very fast storage, like an enterprise NVMe drive. I see this as a strategic tool, not a default. It’s effective for workloads with large, frequently-accessed datasets that are just a bit too big to fit comfortably in RAM.
    • SLOG (Separate Log Device): This is where things get truly critical for enterprise applications. For anything that relies on synchronous writes—think NFS exports for virtualization or database transaction logs—a SLOG is essential for performance. It acts as a fast, temporary journal for incoming writes, allowing ZFS to acknowledge the write to the application instantly. The device used for this must be both extremely low-latency and have built-in power-loss protection. This is non-negotiable if you want to guarantee data integrity.

    From Craftsmanship to Engineering: Automation at Scale

    Managing a single ZFS server by hand is straightforward enough. But what happens when you’re responsible for ten? Or a hundred? This is where we must evolve from being storage craftsmen to storage engineers.

    What I love to see in modern environments is the use of configuration management tools like Ansible, Puppet, or Salt. You use these powerful tools to define your entire storage architecture as code.

    This means the deployment of pools and datasets, the creation of snapshot schedules, the configuration of replication jobs to a DR site… it all becomes automated, version-controlled, and repeatable. The result is absolute consistency across your entire fleet. It dramatically reduces the risk of human error during a late-night manual configuration. And most importantly, it creates leverage, allowing a very small, skilled team to efficiently manage a vast storage infrastructure, reliably and predictably.

    High Availability and Disaster Recovery: The Final Pieces

    This brings us to perhaps the most significant differentiator between the homelab and a true enterprise solution. A homelab is, by its nature, a single point of failure.

    In production, we have to eliminate that.

    • For High Availability (HA): We build an active-passive failover cluster, where two identical server nodes connect to the same shared ZFS storage. If the active server fails for any reason—a bad power supply, a failed motherboard—the passive node takes over its identity and services immediately, and the applications continue to run uninterrupted.
    • For Disaster Recovery (DR): HA only protects you from a local hardware failure. For a true disaster like a fire or power outage, we turn to ZFS’s phenomenal native replication. Using atomic snapshots with zfs send and recv, you can create a perfect, incremental copy of your data on a second system, typically located miles away. This process is incredibly efficient and allows you to build a robust, testable DR plan that meets your specific business objectives.

    Tying It All Together

    As we bring this discussion to a close, what I hope is crystal clear is that scaling ZFS for production is really a story about evolving our mindset. We move from the wonderful, freewheeling flexibility of the homelab to the structured discipline of an engineer.

    It’s about building a system that doesn’t just work sometimes, but one that can be trusted to work all the time. I’ve found that this trust is built on four key pillars:

    1. It starts with validated, enterprise-grade hardware.
    2. It’s supported by a resilient VDEV design that prioritizes recovery over raw capacity.
    3. It’s accelerated with a strategic, multi-layered caching plan.
    4. And finally, it’s made truly robust with a tested High Availability and Disaster Recovery strategy.

    Thank you so much for joining me on this journey today. We’ve built a bulletproof system, but now, how do we secure the sensitive data within it? I hope you’ll join me for episode twenty-two, as we dive deep into the world of ZFS native encryption and the critical task of protecting your data at rest.

    As always, I’d love to hear your thoughts or questions in the comments below!

    Cheers,

  • Episode 20: Unlocking Peak ZFS Storage Performance

    Hello and welcome back to Architecting Zero Downtime Infrastructure! This is episode twenty, and I’m so glad you’re here.

    Today, we’re going to dive into something absolutely fundamental to getting the most from your storage: Performance Tuning ZFS. We’ll be focusing on two magic knobs—recordsize and compression—and how they relate directly to you and your data.

    Now, ZFS is a powerhouse straight out of the box. Its default settings are a safe middle ground, designed to work reasonably well for almost everyone. But here’s the thing about compromises: they rarely deliver peak performance. A default ZFS setup is like an off-the-rack suit—it fits, but it wasn’t tailored for you. And in my experience, that’s where so much potential is left on the table.

    If you’ve ever experienced that frustrating stutter during a video edit, or watched a database crawl to a halt despite running on incredibly powerful hardware, the root cause is often a simple storage misconfiguration. We’re going to fix that. Let’s get that suit tailored.

    The Secret Language of ZFS: Copy-on-Write

    Before we start turning any knobs, it’s critical we’re on the same page about how ZFS actually thinks about your data. At its very heart is a beautifully resilient mechanism called copy-on-write.

    Let me paint a vivid picture for you. Most filesystems are like writers who use a pencil and an eraser. When you change a sentence, they erase the old words and write new ones in their place. ZFS, on the other hand, is like a meticulous accountant using permanent ink. It never overwrites data. When you modify a file, ZFS writes a completely new, updated version of that data to a free spot on the disk. Only then, once it’s safely written, does it update its internal pointers to say, “Hey, the real data is over here now.”

    This is what makes snapshots and data integrity so incredible in ZFS. But the piece we need to laser-focus on today is the chunk of data it’s writing. ZFS writes data in blocks called ‘records’. This record is the fundamental unit, the atomic building block of your data on the disk. And the maximum size of that block… well, that’s precisely what the recordsize property controls.

    Understanding this is the key that unlocks everything else. It’s the foundation for making smart, impactful tuning decisions.

    Your Most Powerful Tuning Knob: recordsize

    At its simplest, recordsize dictates the maximum size of a single chunk of data ZFS will write. The default on most systems is 128 kilobytes (128k). It’s a reasonable, all-purpose number, but as we said, it’s rarely optimal.

    This is where we get to the core trade-off, and it all comes down to your workload. Think of it like choosing the right size of moving box.

    If you’re dealing with large, sequential files—think massive video archives, scientific datasets, or disk images—you want the biggest moving box you can get. For these workloads, I love to see a much larger recordsize, often one megabyte (1M). This allows ZFS to write huge, efficient chunks of data at once, which maximizes throughput and minimizes the overhead of managing metadata. It’s like moving a whole library of giant encyclopedias using a giant pallet—fast and efficient.

    But what happens if your workload is the exact opposite? Imagine a busy database server. This is a world of small, random I/O. Now, if you use that giant 1M moving box to change just a few bytes of data, ZFS has to perform a series of painful steps:

    1. Read the entire 1-megabyte block from the disk.
    2. Change those few tiny bytes in memory.
    3. Write a brand new 1-megabyte block back to the disk.

    This phenomenon is called read-modify-write amplification, and for random I/O workloads, it’s an absolute performance killer. It’s like using a massive moving box just to move a single screw. For these workloads, you need a much smaller, more precise tool. A recordsize of 16 kilobytes (16k), for example, is far more appropriate.

    Matching the Tool to the Job

    Let’s make this practical. My personal rule of thumb is to create different ZFS datasets for different kinds of data. Here are three common scenarios:

    • Media Server: You’re storing huge video files and reading them from start to finish. This is the definition of sequential. My setting: recordsize=1M. The throughput is simply fantastic.
    • Database Server: Precision is everything. An application like PostgreSQL or MySQL often thinks in 8k or 16k blocks. You want to match that. My setting: recordsize=16k. This aligns ZFS with the application, prevents write amplification, and keeps your transaction performance razor-sharp.
    • Virtual Machine Host: This is the ultimate mixed workload. You have multiple guest operating systems all doing their own thing. My setting: A smaller recordsize of 64k often provides a very effective balance between decent throughput for large files and low latency for the constant random I/O of an OS.

    The Big recordsize Gotcha

    Now for a critical detail that trips up so many people. The recordsize property only applies to new data.

    You cannot simply change the recordsize on an existing dataset and expect all your old files to magically re-form themselves. They won’t. The data that’s already on disk is stuck with whatever block size it was written with. This is a painfully common pitfall.

    So what’s the fix? My process involves a clean migration. You create a new, empty dataset with the correct recordsize you want. Then, you use ZFS’s phenomenal native replication tools—zfs send and zfs receive—to stream a perfect, block-for-block copy from the old dataset to the new one. This process effectively rewrites the data, applying the new setting as it goes. It’s a powerful technique, but it really underscores the importance of planning your storage layouts from the start!

    Compression: Your Free Performance Boost

    Let’s talk about the second magic knob: compression. There’s an old, persistent myth that enabling compression on a live filesystem will slow everything down. Years ago, with the CPUs of the day, there was a kernel of truth to that. But today? With modern hardware, that thinking is completely obsolete.

    In fact, ZFS inline compression is effectively a free performance boost.

    Here’s how you should think about it. Your CPU is an F1 race car. Your disks, even your screaming-fast NVMe drives, are a winding country road by comparison. ZFS performs compression in memory, on that F1 racetrack, before the data ever has to get on the slow country road. The tiny fraction of a second your CPU spends making the data smaller is almost always less than the time you save by physically writing less data to the slow disk.

    The net result is a win-win-win:

    1. Faster Writes: You’re writing less data, so it finishes sooner.
    2. Space Savings: This one’s obvious, but it’s a huge benefit.
    3. More Effective Cache: Your ARC (ZFS’s main memory cache) can hold far more data in its compressed form, dramatically increasing the odds of a cache hit.

    Which Compressor Should You Use?

    ZFS gives you choices, and the one you pick matters. Here’s my breakdown:

    • lz4: This is the modern standard and my default recommendation for the vast majority of active workloads. It is incredibly fast—so fast you are unlikely to ever notice the CPU overhead. Its compression ratio is very good, and this perfect balance of speed and efficiency makes it the right choice for almost all production systems. My unbreakable rule: compression=lz4 should be on for everything, unless you have a very specific reason to turn it off.
    • zstd: If you’re dealing with data where storage density is the absolute top priority—think backups or large archives of cold data—then I look to zstd (Zstandard). It gives you a significantly better compression ratio, but it does ask for a little more from your CPU. For archival purposes, that’s a trade-off I’m very happy to make.
    • gzip: You’ll see older options like gzip. While it can compress very tightly, it’s just too slow for most contemporary use cases. In the world of modern ZFS, it’s a bit of a relic. I don’t recommend it for anything active.

    Putting It All Together: A Real-World Build

    Let’s make this concrete. Imagine we’re provisioning a new server. It needs to host a high-transaction PostgreSQL database and serve as a long-term archive for large video files. These are two completely different workloads, but they can coexist perfectly on the same ZFS pool if we treat them as individuals.

    Here’s what I would do. I’d create two separate datasets:

    1. For the Database:

    Bash

    zfs create -o recordsize=16k -o compression=lz4 mypool/database

    We’re explicitly setting the 16k recordsize to match PostgreSQL and using the blazingly fast lz4 compression for our active workload.

    2. For the Video Archives:

    Bash

    zfs create -o recordsize=1M -o compression=zstd mypool/archives

    Here, we’re setting a large 1M recordsize for that glorious sequential throughput and using the more aggressive zstd compression because space efficiency is paramount for this archival data.

    With just two simple commands, we’ve created two specialized storage volumes on the exact same set of disks, each one perfectly tailored for its purpose. This is the real power of ZFS.

    My Most Important Rule: Don’t Guess, Test!

    Everything we’ve discussed is based on sound principles, but you must validate your assumptions for your specific hardware and workload. So please, don’t guess… test.

    Before I change a single setting on a system, my process is always to establish a baseline. You have to know where you’re starting from to know if you’ve actually made an improvement. For this, my go-to tool is fio. It’s the industry standard for a reason. It lets you simulate complex workloads and gives you hard numbers for critical metrics like IOPS and throughput. For a simpler gut-check, you can use a tool like dd for a rough sense of sequential speed.

    But the core principle is what matters: Measure first, make one change, then measure again. And always, always do this on non-production data to prove your tuning choices are the right ones before you roll them out.

    Tying It All Together

    So, to summarize our journey today, it really comes down to a few core ideas:

    • Match your recordsize to your workload. It’s the single most impactful tuning you can make, and it costs nothing but a little planning.
    • Enable lz4 compression by default. On almost every system I manage, this is a non-negotiable. The performance benefit is real.
    • Plan your datasets in advance. Getting the recordsize right from the start saves you a migration headache later.
    • And underpinning all of this is the golden rule: Benchmark your results.

    Thank you for joining me today! I hope this helps you unlock that hidden potential in your own ZFS systems.

    Next time, on Episode 21, we’ll explore ‘Homelab vs. Enterprise: Scaling ZFS for Production Workloads’. We’ll take these principles and see how they apply when you go from a small home server to petabyte-scale enterprise arrays, and we’ll dive into fascinating topics like vdev layouts and special vdevs.

    Until then, happy architecting! I’d love to hear your questions or tuning stories in the comments below.